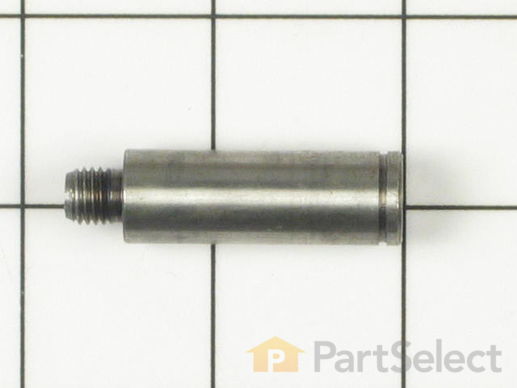
SHAFT, TUMBLER ROLLER
$10.76
Special Order
PartSelect Number
PS2200547
Manufacturer Part Number
Y312948
Manufactured by
Whirlpool
Product Description
SHAFT, TUMBLER ROLLER Specifications
This roller shaft is almost two inches long. It is made entirely of metal and is used for many gas and electric clothes dryers.
How Buying OEM Parts Can Save You Time and Money
Troubleshooting
This part works with the following products:
Estate, KitchenAid, Roper, Whirlpool.
Customer Repair Stories
Average Repair Rating: 2.6 / 5.0, 3 reviews.
What's this?
- < Prev
- 1
- Next >
Sort by:
Search filter:
Clear Filter
Your search term must have 3 or more characters.
Keep searches simple. Use keywords, e.g. "leaking", "pump", "broken" or "fit".
Sorry, we couldn't find any existing installation instruction that matched.
dryer squeeking
removed front panel,lifted top, removed drum and drive belt,remove old rollers and acc and instlled new and reinstalled dryer parts.
Other Parts Used:
-
gerald from park city, MT
-
Difficulty Level:Easy
-
Total Repair Time:1- 2 hours
-
Tools:Pliers, Screw drivers, Socket set, Wrench set
513 of 552 people
found this instruction helpful.
Was this instruction helpful to you?
Thank you for voting!
drum dragging and squeaking loudly.
Disconnected the dryer, removed the front cover, front drum support, and the entire drum (30 min.). Completely cleaned all lint and debris from inside the dryer (30 min.). Installed the new tumbler roller shafts and drum support rollers (20 min.). Installed the new drive belt (30 min.). Re-assembled and re-connected the dryer and ran to verify operation (30 min.). The dryer runs like new.
I found I didn't need the front glide kit , as I replaced the glides a couple years ago and they were in excellent condition.
All in all, the parts, service and instructions were outstanding. I will use PartSelect whenever I need to repair my appliances from now on.
I found I didn't need the front glide kit , as I replaced the glides a couple years ago and they were in excellent condition.
All in all, the parts, service and instructions were outstanding. I will use PartSelect whenever I need to repair my appliances from now on.
Other Parts Used:
-
Michael from Westlake, OH
-
Difficulty Level:Really Easy
-
Total Repair Time:More than 2 hours
-
Tools:Screw drivers, Wrench (Adjustable), Wrench set
17 of 18 people
found this instruction helpful.
Was this instruction helpful to you?
Thank you for voting!
worn out bearing
Unplug the dryer and pull it away from the wall so front and back can be accessed. Remove front panel. Remove front drum support. Remove rear access panel. Disengage drive belt from idler wheel. Make careful note of course of belt and which side is "outward". Remove drum through front. Remove Rollers using circlip pliers. Remove nuts behind shafts. Remove shafts. Clean-up area and parts before re-install.
Install new Shafts and nuts. Grease shafts. Install new Rollers, washers and clips. Drape drive belt over drum while reinstalling from front. Remount drive belt over drive and idler pullies from the rear access. During this step it helps to have a helper to position the belt around the drum in correct fore/aft position, lying flat and without twists, smooth side against drum. Install front drom support. Rotate drum to seat belt before closing up. Install rear panel cover. Install Front panel. Plug it in and turn it on for a test.
Other Parts Used:
-
Chris from Truckee, CA
-
Difficulty Level:A Bit Difficult
-
Total Repair Time:1- 2 hours
-
Tools:Nutdriver, Screw drivers, Wrench set
2 of 2 people
found this instruction helpful.
Was this instruction helpful to you?
Thank you for voting!
- < Prev
- 1
- Next >
Questions and Answers
We're sorry, but our Q&A experts are temporarily unavailable.
Please check back later if you still haven't found the answer you need.
Related Parts