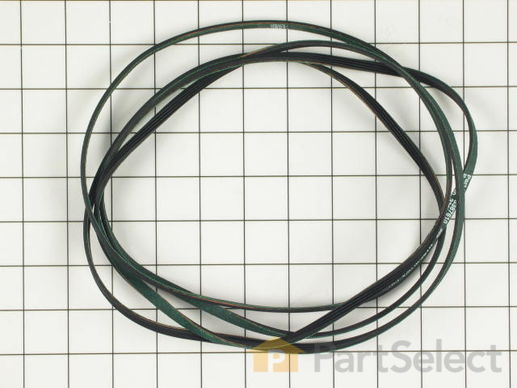
Part Location Diagram of 661570 Whirlpool Multi Rib Belt
See part 20 in the diagram
Replacing your Whirlpool Dryer Multi Rib Belt
( Grid squares measure 1x1 inch )
Customer Service Representative

Get in touch, we're here to help!

Monday to Saturday
8am - 9pm EST

customerservice@partselect.ca

Multi Rib Belt

★★★★★
★★★★★
34 Reviews
$27.90
  In Stock

Get this part fast! Average delivery time for in-stock parts via standard shipping: 1.8 days.

PartSelect Number PS382430
Manufacturer Part Number 661570
Manufactured by Whirlpool
Product Description

Multi Rib Belt Specifications

The Drive Belt is a 93 1/2" belt which wraps around the dryer drum to allow tension and movement. If broken the dryer will not turn properly, or there may be loud noises. The part is rated as "medium" difficulty to install. Refer to your model number and user manual to ensure this part is correct for you. To complete this repair you will need a Phillips screwdriver, 1/4 inch nut driver, a putty knife, and a pair of needle nose pliers. Ensure you disconnect your power to the dryer before beginning this repair, which should take between 30 and 60 minutes maximum to complete.
How Buying OEM Parts Can Save You Time and Money

How Buying OEM Parts Can Save You Time and Money

Part Videos

Replacing your Whirlpool Dryer Multi Rib Belt

Replacing your Whirlpool Dryer Multi Rib Belt
Troubleshooting
This part fixes the following symptoms:
Noisy | Drum Not Spinning | Won’t Start
This part works with the following products:
Dryer, Washer Dryer Combo.
This part works with the following products:
Whirlpool, Kenmore, Maytag, KitchenAid.
Part# 661570 replaces these:
AP2911808, 2925, 3387610, 3389728, 3393999, 339728, 661570, 661570V, 661570VP
Back to Top
Customer Reviews
Average Rating:
★★★★★
★★★★★
34 Reviews
4.7
Filter By Rating:
  • 5 Stars
    28
  • 4 Stars
    4
  • 3 Stars
    1
  • 2 Stars
    0
  • 1 Star
    1
  • 1
  • 2
  • 3
Sort by:
Sorry, we couldn't find any existing reviews that matched. Try using some different or simpler keywords.
  • 1
  • 2
  • 3
Customer Repair Stories
 Average Repair Rating: 3.4 / 5.0, 26 reviews. What's this?
  • 1
  • 2
  • 3
Sort by:
Sorry, we couldn't find any existing installation instruction that matched.
Need it a new pulley and belt
I did the repair all by my self and just payed for the parts.
Other Parts Used:
Idler Pulley Wheel
  • Lucas from Nuevo, CA
  • Difficulty Level:
    A Bit Difficult
  • Total Repair Time:
    30 - 60 mins
  • Tools:
    Screw drivers, Socket set
123 of 172 people found this instruction helpful.
Was this instruction helpful to you?
Thank you for voting!
broken belt
First I removed back and top of dryer, then the support braces holding the drum, after that I took the drum out and the blower covers and cleaned the whole dryer of lint and other debris. Installed the new belt and then reassembled the dryer.
Other Parts Used:
  • Larry from exeter, RI
  • Difficulty Level:
    Easy
  • Total Repair Time:
    30 - 60 mins
  • Tools:
    Nutdriver, Screw drivers
64 of 75 people found this instruction helpful.
Was this instruction helpful to you?
Thank you for voting!
Dryer not spinning
I took off the front panel via 2 screws on the inside of the dryer with the top panel in the maintenance position. Pulled out the tub(cut my hand pretty bad in the process but continued). Did some cleaning and I had to google how the belt tensioner goes into place. Rather difficult on your own i held the belt and placed the tub back into place while placing the belt around the tub putting it in the correct area. thats pretty much it and began reinstalling the parts i had removed.. easy fix now that i have done it once. This is all after my landlords said they werent replacing it and just to have this one hauled off, so all in all i have a 26 dollar dryer now:)
Other Parts Used:
  • john from goldsboro, NC
  • Difficulty Level:
    A Bit Difficult
  • Total Repair Time:
    30 - 60 mins
  • Tools:
    Nutdriver, Pliers, Screw drivers
32 of 47 people found this instruction helpful.
Was this instruction helpful to you?
Thank you for voting!
Insanely loud squeaking
With the correct parts and watching the video, it was so easy to repair. We ordered the wrong part (for the Electric Dryer when it should have been for the Residential Dryer) but the return was easy and we got the new parts super fast. Next time I would probably look at the offending part first before ordering just to make certain. But we used a socket set and Philips screwdriver and actually had our teens do all the work for experience. Fixed the loud noise one and for all.
Other Parts Used:
Idler Pulley with Bracket
  • Stacy B. from MUKWONAGO, WI
  • Difficulty Level:
    Easy
  • Total Repair Time:
    30 - 60 mins
  • Tools:
    Screw drivers, Socket set
17 of 17 people found this instruction helpful.
Was this instruction helpful to you?
Thank you for voting!
Dryer drum was not turning when started.
I moved the dryer to a location where I could get to both the front and back sides. I opened the back by first removing the top cover and then the back. It requires either a Phillips head screwdriver or a quarter inch socket. In addition, it requires removing the four power wires which connect to the computer. If you are unfamiliar with the wiring layout, take a photo with your cell phone which you can then refer to when re-assembling. Once the back was removed, I saw that the belt was still intact, but the pulley which provides tension to the belt was frozen. Take a photo of the belt route between the motor and the pulley. Try to get the spring position in the photo. Remove the belt from the pulley by reducing the tension and then sliding the belt out (this assumes the belt is not broken). The pulley arm is held in place by a single bolt which can be removed by a socket set. Remove the arm with the pulley attached. Examine the pulley to figure out why it is frozen. In my case, the pulley had been frozen for some time and the belt had actually chewed through the pulley and was sliding (polishing) on the pulley axle? I used a pair of pliers to loosen the destroyed pulley by rotating it back and forth over the axle while gripping the arm the axle is attached to. As it loosened up I worked it off the axle. I used a cloth to clean the axle of grime from the belt, pulley, and dryer lint. The new pulley comes with a washer and triangular plastic "fastener". First you put on the washer, then the pulley and then you secure it on the axle by sliding the triangular fastener over the axle so it sits in a small grove near the end of the axle. Then put the pulley arm back by replacing the bolt. Make sure you do not overtighten the arm since it is intended to rotate about the bolt. If the dryer belt breaks, the spring will pull the arm down and throw a cutoff switch. Its operation should be obvious. Once the arm is back in place, refer to your photo and replace the spring (this can be tricky and frustrating, particularly if you don't use something like needle nose pliers). Once the spring is in place, depress it and re-install the dryer belt. Refer to the photo you took earlier if you've forgotten how the belt was routed. Then re-install the dryer's back panel, re-attach the electric wires (again refer to the photo you took earlier), and re-attach the top cover. You might want to test your handiwork at this point before you reconnect the dryer vent
Other Parts Used:
Idler Pulley
  • Dennis from AUSTIN, TX
  • Difficulty Level:
    Easy
  • Total Repair Time:
    30 - 60 mins
  • Tools:
    Pliers, Screw drivers, Socket set
16 of 17 people found this instruction helpful.
Was this instruction helpful to you?
Thank you for voting!
Loud sreeching and vibration
I just followed the videos I received with the order and everything went really well. This dryer was a little different than the video, but the process was the same. The HE3 does require 4 drum rollers and I had only ordered 2. However, there was only one bad roller, so I installed both on the back of the drum. The two front rollers are pretty easy to get to if they go bad. The idler pulley was completely worn out with an 1/8 inch groove worn off to one side. PartSelect made this an easy project!
Other Parts Used:
Roller Support Tri-Ring Dryer Drum Support Roller Thrust Washer Idler Pulley
  • Robert from TUTTLE, OK
  • Difficulty Level:
    Really Easy
  • Total Repair Time:
    1- 2 hours
  • Tools:
    Nutdriver, Pliers, Screw drivers
13 of 14 people found this instruction helpful.
Was this instruction helpful to you?
Thank you for voting!
Broken Belt
Started at the top by laying back the control panel, then I removed the top panel, then the front panel, next the drum and the broken belt. before I put it back together in reverse order, I vacuumed the inside of the dryer and the exhaust vent
Other Parts Used:
  • Ken from LOMBARD, IL
  • Difficulty Level:
    Really Easy
  • Total Repair Time:
    30 - 60 mins
  • Tools:
    Nutdriver, Pliers, Screw drivers
7 of 9 people found this instruction helpful.
Was this instruction helpful to you?
Thank you for voting!
no issue at all!
even though my appliance is a little different from video i still was able to repair my appliances based on the video. definitley cheaper than buying a new one!
Other Parts Used:
PLATE Idler Pulley
  • angelo from NATIONAL CITY, CA
  • Difficulty Level:
    Very Easy
  • Total Repair Time:
    30 - 60 mins
  • Tools:
    Nutdriver, Screw drivers, Socket set
7 of 11 people found this instruction helpful.
Was this instruction helpful to you?
Thank you for voting!
Dryer would not start.
With the help of YouTube, I was able to watch videos of how to disassemble and reassemble the dryer. I watched a video showing where the Thermal fuse and Thermostat was located as well as how to test them with a meter. I watched another video showing how to replace the drum belt, showing step by step instructions. Without YouTube it would have been a whole different story!
Other Parts Used:
Disposable Thermal Fuse - Two Terminal Dryer Cycling Thermostat
  • John from HATFIELD, PA
  • Difficulty Level:
    Easy
  • Total Repair Time:
    30 - 60 mins
  • Tools:
    Nutdriver, Pliers, Screw drivers, Socket set
6 of 9 people found this instruction helpful.
Was this instruction helpful to you?
Thank you for voting!
Drive pulley broke. Looked like clip holding it on broke and pulley was running crooked.Belt was squealing some a couple of weeks before it broke.
Removed top and back covers. Placed new pulley and retaining clip in place. I had to remove a couple of drum supports to put belt on. Probably didn't have to remove top.
Other Parts Used:
Idler Pulley
  • Mark from Sheffield, PA
  • Difficulty Level:
    Easy
  • Total Repair Time:
    30 - 60 mins
  • Tools:
    Socket set
6 of 7 people found this instruction helpful.
Was this instruction helpful to you?
Thank you for voting!
  • 1
  • 2
  • 3
Questions and Answers

We're sorry, but our Q&A experts are temporarily unavailable.
Please check back later if you still haven't found the answer you need.

Related Parts
Model Cross Reference
This part works with the following models:
PartSelect Number: PS382430
Manufacturer Part Number: 661570
Brand
Model Number
Description
Kenmore
10697502820
Dryer - Kenmore Dryer Model 106.97502820 (10697502820, 106 97502820) Parts
Kenmore
11060052990
Dryer
Kenmore
11060052991
Dryer
Kenmore
11060056990
Dryer
Kenmore
11060056991
Dryer
Kenmore
1106007299
Dryer - Kenmore Dryer Model 110.6007299 (1106007299, 110 6007299) Parts
Kenmore
11060072990
Dryer
Kenmore
11060072991
Dryer
Kenmore
11060092990
Dryer
Kenmore
11060092991
Dryer
Kenmore
11060094990
Dryer
Kenmore
11060094991
Dryer
Kenmore
11060096990
Dryer
Kenmore
11060096991
Dryer
Kenmore
11060097990
Dryer
Kenmore
11060182000
Dryer
Kenmore
11060372710
Dryer - Dryer
Kenmore
1106090199
Dryer - Kenmore Dryer Model 110.6090199 (1106090199, 110 6090199) Parts
Kenmore
11060901990
Dryer
Kenmore
1106090299
Dryer - Kenmore Dryer Model 110.6090299 (1106090299, 110 6090299) Parts
Kenmore
11060902990
Dryer
Kenmore
11060904990
Dryer
Kenmore
1106090799
Dryer - Kenmore Dryer Model 110.6090799 (1106090799, 110 6090799) Parts
Kenmore
11060907990
Dryer
Kenmore
11060912990
Dryer
Kenmore
1106092299
Dryer - Kenmore Dryer Model 110.6092299 (1106092299, 110 6092299) Parts
Kenmore
11060922990
Dryer
Kenmore
11060924990
Dryer
Kenmore
1106092799
Dryer - Kenmore Dryer Model 110.6092799 (1106092799, 110 6092799) Parts
Kenmore
11060927990
Dryer
Customer Service Representative

Get in touch, we're here to help!

Monday to Saturday
8am - 9pm EST

Contact Customer Service