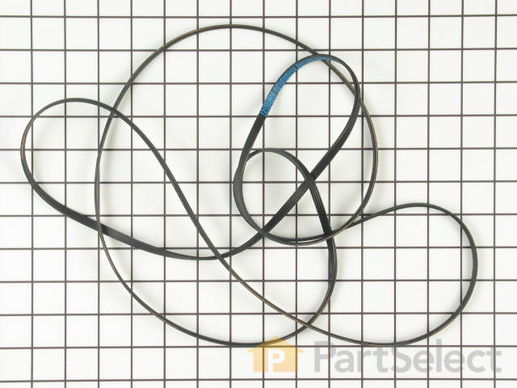
Part Location Diagram of 131553800 Frigidaire Multi Rib Belt
See part 17 in the diagram
( Grid squares measure 1x1 inch )
Customer Service Representative

Get in touch, we're here to help!

Monday to Saturday
8am - 9pm EST

customerservice@partselect.ca

Multi Rib Belt

$33.54
  In Stock

Get this part fast! Average delivery time for in-stock parts via standard shipping: 1.8 days.

PartSelect Number PS418119
Manufacturer Part Number 131553800
Manufactured by Frigidaire
Product Description

Multi Rib Belt Specifications

This multi ribbed belt is flat and but has four ridges. This belt is 87-3/8 inches in length and is 1/4 inch wide.
How Buying OEM Parts Can Save You Time and Money

How Buying OEM Parts Can Save You Time and Money

Troubleshooting
This part fixes the following symptoms:
Noisy
This part works with the following products:
Dryer.
This part works with the following products:
Frigidaire.
Part# 131553800 replaces these:
AP2107128, 12753, 131130700
Back to Top
Customer Repair Stories
 Average Repair Rating: 2.8 / 5.0, 20 reviews. What's this?
  • 1
  • 2
Sort by:
Sorry, we couldn't find any existing installation instruction that matched.
Clothes getting scorch marks, drum noise
First and foremost, I read the repair reviews here at parts source and found that a) Other people had the same symptoms, b)following their repair tips made it super easy.
What I would add to previous reviews is to pull the front off or the little acces grill in back and check to see what kind of belt you have. According to the model #, It showed the wide flat belt when in fact I had the smaller ribbed belt. Glad I checked before ordering.
A few things that will make your life easier is once you have the old upper guide/seal removed, put down the glue then use several med sized plastic spring clamps to hold the seal in place while the glue sets up, (@ 20-30 min). Their cheap and you should have some around anyway. When replacing the seals I would go ahead and replace the belt too. It's cheap and if your machine is 5+ yrs old probably is worn. Total cost of repair was about $60 (inc shipping). Took about 1 hr 20 min total time. Most of that time was scrapping the old seal material/ glue off the dryer front. Actual disassembly and repair maybe 1/2 hour. Other little tip is the clips for the lid of dryer is to use a flat screwdriver and gently push straight in until it's compressed enough to release the lid, it will pop up when pushed in far enough. That one took me a while to figure out.
Thanks to Part Select for such a helpful site. My dryer is like new again.
Other Parts Used:
Upper Drum Glide Front Drum Seal
  • Matthew from Portland, OR
  • Difficulty Level:
    Really Easy
  • Total Repair Time:
    1- 2 hours
  • Tools:
    Pliers, Screw drivers
561 of 570 people found this instruction helpful.
Was this instruction helpful to you?
Thank you for voting!
Brown spots on clothing
I was getting brown spots on my clothing since I bought this used dryer. Went to partselect.com Fine with me, but not my wife and daughter! Anyway, after ruling out rust, I ended up here and found Randy's story - without it, I'd be lost! Basically, the felt seal crushes over time, and clothing gets caught in the gap stuck against this nasty old brown felt and leaves a mark.

Replacing the belt was a very good idea, though as mentioned, the drum support bearing is just a "nice to do" - not necessary, but it gives you the excuse to re-grease it (I used a thick Molly impregnated grease from my motorcycle).

The only other advice I can give is that I used a chisel to scrape off the old felt - it came off in very little time, and I didn't end up needing to really do much cleaning of the drum afterwards. Just use a sharp one you're not afraid to dull - it'll be metal-on-metal contact.

Using the spring-loaded clamps that you can get from the hardware store was also a huge help - it just needs to keep the upper glide stuck to the drum for the 30 minutes for the glue to cure - I used 6, but 3 would work. The bottom seal doesn't need them as the felt will tend to stick to the drum when the glue is applied.

You might not NEED to replace the lower seal, but I'd suggest it. It's cheap enough, and this job is "not fun" enough that it only adds a few minutes total - good insurance that you do a complete job.

You also might want to get some aluminum foil tape and re-tape your blower extension tube - mine was ripped off from moving from house to house over the years.
Other Parts Used:
Upper Drum Glide Front Lower Drum Seal Drum Support Bearing
  • Dan from Portland, OR
  • Difficulty Level:
    A Bit Difficult
  • Total Repair Time:
    1- 2 hours
  • Tools:
    Pliers, Screw drivers, Wrench set
193 of 263 people found this instruction helpful.
Was this instruction helpful to you?
Thank you for voting!
Burn/rust marks on clothes
Like many others, i was suffering the problem of rust marks on clothes, which ruins them for good.

We have a Frigidaire Gallery dryer, gas, front loading stacked in top of the washer, which is about 7 or 8 years old.

Turns out the top felt seal was worn out, allowing clothes to get stuck between the drum and the door where they would get the rust colored stain. I think this is fairly common. It also "ate" zippers and buttons.

To open the dryer up, you first want to remove 2 screws at the bottom of the front panel, they are covered by little plastic plugs that pop out. Then, go in through the top- you have to pop the lid up from the front, and it swings up like a car hood. from the top, you have to reach in and undo a screw on each side that holds the front panel to the body of the dryer. it's a little tricky.

After those four screws are removed, the front panel is held on by pressure clips, which you can reach from the top and squeeze so they 'let go'. As those release, the front panel will fall outward with the bottom still attached- there are two small pieces of metal at the bottom that the panel sits in. So you lift the panel straight up to get them off those two guides/hooks, and it's clear.

Next you'll want to shop vac the heck out the whole dryer interior. Mine was caked with dust and lint.

Step two is felt replacement. you have to use some muscle to tear the felt off the top of the door opening, which will leave a bunch of ripped felt stuck to the high temp glue. That's where the wire brush and the Goof Off come in. That stuff worked like a charm to remove every last bit of felt and glue.

Once clean and dry, apply the glue that came with the felt guide, set the felt in place (with those plastic pieces facing up), and hold in place for a while. I used plastic clamps to hold the felt in place for about 30 minutes while the glue set.

For good measure, i also replaced the dryer belt and the plastic ball joint that the drum sits in, but i don't think that was necessary. The belt may be a good idea, and to do that you remove the belt by popping it off the little plastic wheel under the drum first, then it'll be loose and you can remove the belt and put a new one on. (This is also a little tricky, take it one step at a time.)

Then put it back together in reverse order and you'll be done with those rust marks.

(Mine is working great)
Other Parts Used:
Front Drum Seal Rotary Knob Drum Support Bearing
  • Randy from Anchorage, AK
  • Difficulty Level:
    Easy
  • Total Repair Time:
    1- 2 hours
  • Tools:
    Pliers, Screw drivers, Socket set
42 of 47 people found this instruction helpful.
Was this instruction helpful to you?
Thank you for voting!
Orange stains on clothes from dryer!
I wish I had searched the problem down several years earlier...

Finally got sick of stained clothes when a new set of cotton sheets got stained. My wife was on the verge of ordering me to get a new dryer. After spending 15 minutes googling (why didn't I do this years before..!?!) I found the answer. Old, worn drum glide!

As with other reader stories, since I gotta take the thing apart to replace the drum glide, may as well replace the belt and lower glide.

Read the other stories for detailed repair instructions. It's not hard, but it does take an extra pair of hands and some patience.

Take the opportunity to clean the inside of the dryer (you have a lot of lint in there, I expect) to prevent fire. Also clean your duct vents. Better safe than sorry!
Other Parts Used:
Upper Drum Glide Front Lower Drum Seal
  • Timothy from Berkeley, CA
  • Difficulty Level:
    A Bit Difficult
  • Total Repair Time:
    More than 2 hours
  • Tools:
    Screw drivers, Wrench (Adjustable)
37 of 1233 people found this instruction helpful.
Was this instruction helpful to you?
Thank you for voting!
Dryer stopped turning - electrical burning smell
1st, I checked to see if there was anything stopping the drum from turning, that would cause the motor to seize and burn. When that was not the issue, it was evident that the motor was burned out and needed replacement.
2nd, I checked the partselect web site for the parts that would be required to replace the motor, belt, and felt drum guides since I was also getting brown rust stains on the clothes.
3rd, after recognizing that all the parts were in stock and with helpful instructions, I proceeded to take the dryer apart.
4th, unplugged the dryer, removed the cover by removing the 2 back fasteners with a phillips head screwdriver and popped the front of the top off. Remember to slide the grounding wire from the top to the base, found in the back of the top.
5th, I removed the front panel and disconnected the wiring harness. Make sure to mark the connectors so you place it back together the right direction. I placed the front panel aside and also realized the felt strips were brown and the silicon guides were broken, meaning I needed to replace them.
6th, I removed the small back panel near the floor and removed the belt from the idler pulleys and the motor drive shaft.
7th, lifted the drum out of the dryer cabinet by lightly lifting up on the back of the drum to pop the bearing out of the casing on the back of the cabinet. I checked the belt and realized it was cracked and needed replacement. I also noted that the bearing was worn, dirty and needed replacement.
8th, I then popped the spring off the back of the motor bearing, removed the fan housing by removing the 2 screws fastened to the bottom of the cabinet and disconnected the wiring hariness from the motor and the fan. Again, mark the connectors so you know which is up or front when you replace it.
9th, I removed the nut from the fan, recognized the "remove arrow" and used a socket wrench to remove the fan from the motor shaft by turning counter clockwise. there is also a bushing between the fan housing and the motor, and once you get the housing out, you press in the snaps on the side and slide the piece out to release the motor.
10th, I then ordered the parts and cleaned the entire inside of the cabinet, the idler pully's, the exhaust vent, etc. so it was as good as new!
11th, I installed the motor in the fan housing and placed it back in its mount, connected the electric and the front panel and plugged in the cord and turned on the power to make sure the motor worked! Voila!
12th, unplugged the electrical and then proceeded to re-install the fan housing, the drum bearing, pulled off the felt guides, used acetone to remove the adhesive and then added the new, placed the belt on the drum and lifted it back into the cabinet, fed the belt through the pulleys via the back door, connected the power and watched it run!
13th, put the front panel and top back on, connected the vent to the outside and it was all done.
Other Parts Used:
Upper Drum Glide Front Lower Drum Seal Rear Drum Bearing Kit Drum Glide - White Motor and Pulley
  • Bob from Moraga, CA
  • Difficulty Level:
    Easy
  • Total Repair Time:
    More than 2 hours
  • Tools:
    Pliers, Screw drivers, Socket set, Wrench set
31 of 687 people found this instruction helpful.
Was this instruction helpful to you?
Thank you for voting!
Broken Belt and Bad Idler Pulley
I unplugged the power cord first of all. Then I pulled the dryer away from the wall so I could get behind it and take off the small vent cover that had two screws holding it. Then I reached in and grabbed the old, broken belt and pulled it out. I reached in and disconnected the idler pulley off of the metal stud that it slid onto and then disconnected the spring off of it. After receiving the new parts I took the new idler pulley and reattached the spring to it and then attached the metal housing to the metal stud where the slot was at. I went to the front of the dryer and took the screws out of the top of the door housing pried the door housing away from the top of the dryer about 8". Also I opened the door of the dryer where I took the new belt and put it around the dryer drum as far as I could get it towards the back. Then I went to the back of the dryer. I put my hand into the vent hole and grabbed ahold of the belt and pulled it all the way towards the back where the old belt used to ride on the dryer drum. Then I pulled all the slack and put the belt over on the pulley that was on the motor. After that I pulled the idler pulley back far enough to position the belt on the pulley and that caused tension on the belt. I then put the vent cover back in place on the back of the dryer and put the two screws in it to hold it. I went around to the front and closed the door on the dryer and put the front housing back into place. After that I put the screws into the top of the front housing. The job was complete so I plugged in the dryer to test it and everything worked fine.
Other Parts Used:
Idler Pulley Assembly
  • Kirby Grey from Beaufort, NC
  • Difficulty Level:
    A Bit Difficult
  • Total Repair Time:
    More than 2 hours
  • Tools:
    Pliers, Screw drivers, Socket set
24 of 26 people found this instruction helpful.
Was this instruction helpful to you?
Thank you for voting!
Dryer making noise, discoloring clother and eventually stopped turning
Unplugged dryer. Removed top of dryer. Removed front panel. Remove small access to belt in back panel and note belt configuration thru pullies. Removed plastic guide on front frame, 1 screw. Removed belt. Removed Drum. Lift up drum to release from bearing assembly bracket in back. Small bearing was missing. Removed rear bearing assembly brackets. Removed idler pully assembly, one bolt. Thoroughly vacuum and clean. Scrape off felt on front panel and clean well. Glue on front top of front panel and clamp new felt and guides in place. Replace bearing bracket in rear being careful to replace the small bearing that was missing. I used my laptop to guide me. I had your schematic diagram up on the lap top to make sure I put it back together correctly. Replaced Idler Pully Assemply. 1 bolt.
Unscrew old plate and large ball from back of dryer by unscrewing 3 screws from inside drum. Replace with new part and screws. Put drum back in place and insert in bracket in back. Remove clamps from felt and guides. Put belt in place. Replace palstic guide on front frame one screw. Close front panel. From back access panel thread belt thru pullies. Close back panel. Close top. Allow glue to dry. 2 hours. Test. OK. Allow glue to set 24 hours. Dryer works great. OH yeah. Plug back in..
Other Parts Used:
Upper Drum Glide Rear Drum Bearing Kit Idler Pulley Assembly
  • RICHARD from MERCHANTVILLE, NJ
  • Difficulty Level:
    Really Easy
  • Total Repair Time:
    More than 2 hours
  • Tools:
    Nutdriver, Screw drivers, Socket set
23 of 650 people found this instruction helpful.
Was this instruction helpful to you?
Thank you for voting!
Dryer fell off leveling piece and locked the drum.
I removed the gate in the back and found the belt had snapped. I continued to dismanlte the entire dryer to see what else was damaged. I pulled the drum out and ran the unit to make sure the motor didn't burn out and that the heater coil worked, which both did (I had no idea, this unit came with the house I purchased. They told me is was broken.) So after finding the belt broken I saw that the top felt guide was rubbed down so far that the plastic guides where in paper thin, craked pieces.

I used the manuel that came with the felt guide to glue the new one on. If you do not replace the lower felt guide as well, make sure you mash the top felt down so that it's level with the lower felt. after I got my unit assembled the top guide pulled away because I didn't do this.
Installing the belt is timely, but easy. remove the drum then lay the belt around the visible line that the old one creates. Use this site's diagram to affix it to the pull and motor and that's that. Rotate the drum with your hand to even the belt out all around the drum to prevent it wobbling. I did this installation by myself, but it would have been much much easier if I had a set of hands on the other side of the unit.
Parts all fit together by either sheet screws or clips. Just keep track of which screw goes where. some are different sizes.
Other Parts Used:
Upper Drum Glide
  • Dustin from Wonder Lake, IL
  • Difficulty Level:
    Easy
  • Total Repair Time:
    1- 2 hours
  • Tools:
    Screw drivers
8 of 11 people found this instruction helpful.
Was this instruction helpful to you?
Thank you for voting!
The dryer was squealing when running.
Based on all of the other posts, their explanations were right on, so I won't repeat it here. You could probably do this repair on your own, but it helps having someone to hold the drum while reattaching the screws. I replace the rear drum bearing assembly and the belt. I would recommend replacing the belt. I almost didn't, but I'm glad I did. Once I had it off, I could see the cracks in it.

When installing the new bearing, make sure that you pack it with the supplied grease. Be liberal with it. I used what left over grease I had to grease the idler puller bearings too.

The dryer works perfectly now, with no squealing. My experience with Parts Select was flawless. The shipping was extremely fast, and the parts were as described. Finding the correct parts was a snap thanks to their easy to use web site.
Other Parts Used:
Rear Drum Bearing Kit
  • Greg from Nibley, UT
  • Difficulty Level:
    Easy
  • Total Repair Time:
    15 - 30 mins
  • Tools:
    Screw drivers
6 of 6 people found this instruction helpful.
Was this instruction helpful to you?
Thank you for voting!
My dryer squeaked - the squeak from hell
We had to take off the front door - rather simple. The belt was OK. It simply fit over the drum then was tightened up. The seal supplied didn't want to stick to the door. Thinking it was the wrong one - we went shopping. Come to find out it was the correct seal but the glide has been changed since the inception of my dryer. We had to poke holes in the seal to get the nibs on the glide to fit in the seal. Then it wouldn't stick to the dryer door, so we had to sand the outer door and we put some rtv on it and tied a belt around it to hold it. After drying for a couple of hours, we re-assembled the dryer only to have it overheat and burn up. New dryer $389. sad but true.
Other Parts Used:
Front Drum Seal Drum Glide - White
  • Barbara from Rohnert Park, CA
  • Difficulty Level:
    A Bit Difficult
  • Total Repair Time:
    More than 2 hours
  • Tools:
    Nutdriver, Screw drivers, Wrench (Adjustable)
6 of 9 people found this instruction helpful.
Was this instruction helpful to you?
Thank you for voting!
  • 1
  • 2
Questions and Answers

We're sorry, but our Q&A experts are temporarily unavailable.
Please check back later if you still haven't found the answer you need.

Related Parts
Model Cross Reference
This part works with the following models:
PartSelect Number: PS418119
Manufacturer Part Number: 131553800
Brand
Model Number
Description
Frigidaire
DE7000ADD1
Dryer - Residential, 27", Electrical
Frigidaire
DE7000AWW1
Dryer - Residential, 27", Electrical
Frigidaire
DE7200ADD1
Dryer - Residential, 27", Electrical
Frigidaire
DE7200AWW1
Dryer - Residential, 27", Electrical
Frigidaire
DG7000ADD1
Dryer - Residential, 27", Gas
Frigidaire
DG7000AWW1
Dryer - Residential, 27", Gas
Frigidaire
DG7200ADD1
Dryer - Residential, 27", Gas
Frigidaire
DG7200AWW1
Dryer - Residential, 27", Gas
Frigidaire
F31C747CS0
Dryer - Residential, 27", Electrical
Frigidaire
F31C747CT0
Dryer - Residential, 27", Electrical
Frigidaire
F32C747CS0
Dryer - Residential, 27", Gas
Frigidaire
F32C747CT0
Dryer - Residential, 27", Gas
Frigidaire
FDE747GES0
Dryer - Residential, Electric
Frigidaire
FDE747RBS0
Dryer - Residential, 27", Electrical
Frigidaire
FDE747RBS1
Dryer - Residential, 27", Electrical
Frigidaire
FDE747RBT0
Dryer - Residential, 27", Electrical
Frigidaire
FDE747RBT1
Dryer - Residential, 27", Electrical
Frigidaire
FDE747RES0
Dryer - Residential, Electric
Frigidaire
FDE747RET0
Dryer - Residential, Electric
Frigidaire
FDE7977ES0
Dryer - Residential, Electric
Frigidaire
FDE7977EW0
Dryer - Residential, Electric
Frigidaire
FDE847GCS0
Dryer - Residential, 27", Electrical
Frigidaire
FDE847GCT0
Dryer - Residential, 27", Electrical
Frigidaire
FDE847GES0
Dryer - Residential, Electric
Frigidaire
FDE847GET0
Dryer - Residential, Electric
Frigidaire
FDE847RBS0
Dryer - Residential, 27", Electrical
Frigidaire
FDE847RBT0
Dryer - Residential, 27", Electrical
Frigidaire
FDG747GES0
Dryer - Residential, Gas
Frigidaire
FDG747RBS0
Dryer - Residential, 27", Gas
Frigidaire
FDG747RBS1
Dryer - Residential, Gas
Customer Service Representative

Get in touch, we're here to help!

Monday to Saturday
8am - 9pm EST

Contact Customer Service