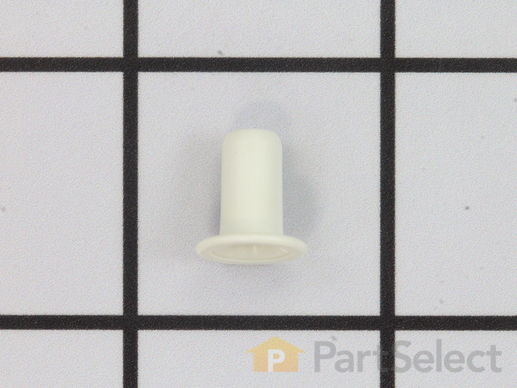
Folding Tines Sleeve
$13.61
Special Order
PartSelect Number
PS11748488
Manufacturer Part Number
WPW10116789
Manufactured by
Whirlpool
Product Description
Folding Tines Sleeve Specifications
Sold Individually. White in color.
How Buying OEM Parts Can Save You Time and Money
Part Videos
Replacing your Maytag Dishwasher Folding Tines Sleeve
Troubleshooting
This part works with the following products:
Dishwasher.
This part works with the following products:
Maytag, Jenn-Air, Amana.
Part# WPW10116789 replaces these:
AP6015215, 9-12710, 912710, W10116789, Y912710
Customer Repair Stories
Average Repair Rating: 4.2 / 5.0, 10 reviews.
What's this?
- < Prev
- 1
- Next >
Sort by:
Search filter:
Clear Filter
Your search term must have 3 or more characters.
Keep searches simple. Use keywords, e.g. "leaking", "pump", "broken" or "fit".
Sorry, we couldn't find any existing installation instruction that matched.
Dishwasher leaking (small puddle)
My dishwasher was leaking a small amount and it seemed to be happening during the last half of the cycle. The insulation at the bottom of the door was wet but not directly under the dishwasher by the motor etc. I tried the door gasket which was a simple 2 minute job but that didn't solve the issue. I took apart the door by removing the seven torx head screws on the inside (don't worry about the metal pieces on the sides with the phillips screws). I could see some white powdery build up and watermarks coming from the soap dispenser area. I thought maybe there was crack in the door. But after taking out the solonoid (it just snaps in and out) I could see light around the little latch that holds the soap dispenser door shut. I tried a bit of caulking but it just fell out after a day or so. Then I found the little grommet on PartsSelect.com. You have to take off a white plastic cover that covers the door latch mechanism - it snaps in and out on one point. A couple screws hold the plastic assembly in place. You can just remove the whole assembly, it doesn't need to be taken apart. Remove the old grey gasket around the latch and put the new one over the latch. It's more like a "boot" like around a shift lever in a car. Put the assembly back in with the latch going through the hole. Make sure the gasket covers the hole. Tighten the screws down, not so much as to tear the gasket but enough to be snug against it. Snap the white cover back on. Snap the solonoid back in place. Put the door back in place. Put the seven screws back in. You're all set - no leaks. The key to troubleshooting was that it started leaking during the rinse cycle after the soap dispenser latch had flipped up exposing the worn boot around the latch.
Other Parts Used:
-
Gregg from Woodbury, MN
-
Difficulty Level:A Bit Difficult
-
Total Repair Time:15 - 30 mins
195 of 267 people
found this instruction helpful.
Was this instruction helpful to you?
Thank you for voting!
Wheel had broken off along with the folding tines' clip
All I had to do was to snap the parts into place. I also had someone come here to find a leak in my dishwasher. It was in the latch and seal that kept the soap dispenser closed. They wanted to charge me over $50 when the part only cost less than $9 with shipping. I just ordered it and installed it myself. Piece of cake!
Other Parts Used:
-
Gina from West Alexandria, OH
-
Difficulty Level:Really Easy
-
Total Repair Time:Less than 15 mins
130 of 254 people
found this instruction helpful.
Was this instruction helpful to you?
Thank you for voting!
Some of the fold up/down tines in the lower basket were defective as well as the door handle was broken
The wheels and clip were just snapped in to replace old or missing ones. The door latch required the inside cover of the door assembly to be loosen enough to remove the old latch and replace the new latch.
approximately ten screws were involved.
Other Parts Used:
-
Manfred from Fredricksburg, VA
-
Difficulty Level:Really Easy
-
Total Repair Time:30 - 60 mins
-
Tools:Nutdriver, Pliers, Screw drivers
70 of 135 people
found this instruction helpful.
Was this instruction helpful to you?
Thank you for voting!
Clips holding folding tines broken
The clips holding the folding tines on the lower rack had broken, so the folding racks were flopping around. I entered the model number an PartSelect popped up exactly the right diagrams to find the parts I needed - I even found the handle for the silverware tray that I didn't know was missing. I ordered before noon, and the parts arrived the next day, all at a very reasonable cost (even shipping!) the parts just snapped in place. I'm very, very pleased.
Other Parts Used:
-
Greg from Towanda, PA
-
Difficulty Level:Really Easy
-
Total Repair Time:Less than 15 mins
65 of 127 people
found this instruction helpful.
Was this instruction helpful to you?
Thank you for voting!
Rusty RAcks
Was discouraged seeing rust on both upper and lower racks. Remebered prior dishwasher and $300+ estimate for the racks. But the rusty parts were only some of the small moveable parts of the rack. Each one just snapped out, and the replacement snapped in. No tools at all. Five minutes and $55 later the racks looked new.
Other Parts Used:
-
Robert from Escondido, CA
-
Difficulty Level:Really Easy
-
Total Repair Time:Less than 15 mins
12 of 20 people
found this instruction helpful.
Was this instruction helpful to you?
Thank you for voting!
Rusting Lower Dish Rack
The replacement of the rack was straightforward, but the tower assembly had to be moved to the new rack. The fit is precise and fits only one way. I did break off one tab, but it is held just fine. .
Other Parts Used:
-
Douglas from Santa Ana, CA
-
Difficulty Level:A Bit Difficult
-
Total Repair Time:15 - 30 mins
3 of 5 people
found this instruction helpful.
Was this instruction helpful to you?
Thank you for voting!
Old parts had worn out
Replaced and repaired in less than five minutes using No tools
Other Parts Used:
-
John from Mission Viejo, CA
-
Difficulty Level:Really Easy
-
Total Repair Time:Less than 15 mins
1 person
found this instruction helpful.
Was this instruction helpful to you?
Thank you for voting!
clip on adjustable peg was broken, sleeves were missing
I just snapped out the clips, replaced them with the new clips and sleeves and replaced them. It was a little confusing getting the configuation just right but after that it was a snap.
Other Parts Used:
-
Sharon from Lawton, OK
-
Difficulty Level:Easy
-
Total Repair Time:Less than 15 mins
1 person
found this instruction helpful.
Was this instruction helpful to you?
Thank you for voting!
missing parts for dishwasher
Ordered parts, opened package, installed parts.
Other Parts Used:
-
lowell from dickson, TN
-
Difficulty Level:Easy
-
Total Repair Time:Less than 15 mins
1 of 4 people
found this instruction helpful.
Was this instruction helpful to you?
Thank you for voting!
Parts broken
installed new parts
Other Parts Used:
-
Richard from Tampa, FL
-
Difficulty Level:Really Easy
-
Total Repair Time:30 - 60 mins
0 of 9 people
found this instruction helpful.
Was this instruction helpful to you?
Thank you for voting!
- < Prev
- 1
- Next >
Questions and Answers
We're sorry, but our Q&A experts are temporarily unavailable.
Please check back later if you still haven't found the answer you need.
Related Parts
Model Cross Reference
This part works with the following models:
PartSelect Number: PS11748488
Manufacturer Part Number: WPW10116789
Brand
Model Number
Description